I’m so excited to introduce you all to my latest collection - The Anemone Bowls. Last spring, I played around with some prototypes for a floral motif bowl and got busy with summer, then the fall, moving our studio…long story short: I put the idea down.
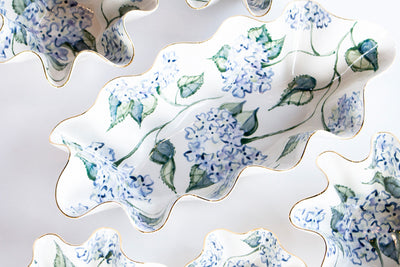
Fast forward to January, I am dreaming, journaling, sketching for 2020 ideas. I made a quick sketch of some anemones and framed it in a wavy shape to see what they might look like on the inside of one of our bowls!

It took a few tries, but finally we figured out how to make the bowl slightly thicker to withstand the carving of the drawing. I start out by rolling out a slab of clay, and cutting it to size for the bowl.


Each bowl is based off of the original sketch. When I start to plan out my composition, I think about how the flowers are going to either roll over the waves of the sides of the bowl, or have a strong presence in the bottom center of the bowl. It takes a little creative planning, sketching, erasing, sketching again for every bowl’s carved sketch to come to life.
After they’re carved, they’re formed into a wavy bowl, dried, smoothed, fired, glazed, fired again, and finally, gilded with our 22k gold luster and fired for a final time.


I am so happy with how these beauties turned out and had a blast creating each and every one! They’ll be available tomorrow to our VIP email subscribers first! https://shopsusangordonpottery.com/pages/stay-in-the-loop to sign up!